

Personnel File
A personnel file is assigned to a person who is standing in an upright employment relationship with the company or will be or was in such an employment relationship.
Besides the possibility to enter metadata, documents can be stored in a personnel file. In a personnel file, an overview of all documents of the personnel file is displayed on top-level. The tree view can be used to navigate in the several personnel file folders.
Personnel files, personnel file folders and documents are filtered, if the user has no access rights.
Create Personnel File
To create a personnel file, perform the following steps:
- Navigate in the personnel file dashboard or in the desired personnel file shelf.
- Click the “Create Personnel File” action.
- If you are in the personnel file dashboard and several personnel file shelves exist, select the desired personnel file shelf.
- Enter the data on the “Master Data”, “Contact Data” and “Access” tab. At least the surname has to be specified.
- If the personnel number is not generated automatically, you have to enter it manually. When using the manual assignment you can also enter additional personnel numbers.
- On the “Access” tab, in the Assigned User field you can enter a user who corresponds with the personnel file and should get read access.
In the Supervisors field, you can enter users/organizations that should get read access to all personnel files of their subordinates.
Note: If it is configured that users are taken over from the organizational structure the fields are displayed read-only.
- Click “Next”.
More information about accessing personnel files as employee or supervisor can be found in chapter “Personnel File”.
Note: Personnel files can only be created if a Folder Structure for Personnel Files is defined in the personnel file configuration.
Import Personnel Files
Personnel files can be imported and updated using a CSV file.
To import personnel files, perform the following steps:
- Navigate in the personnel file dashboard or in the desired personnel file shelf.
- Click the “Import Personnel Files” action.
- Optionally, click the “Download CSV Template” button to retrieve a template that describes the necessary data structure.
- Enter the path to the CSV file in the Content field.
- Click “Start Import”.
- After the import has finished, click “Next”.
The personnel files are stored in the personnel file shelf.
Note:
- For the personnel file import, a manual assignment of personnel numbers is required (settings of the personnel file shelf > “Numbering” tab > Generate Personnel Number Automatically > “No”).
- To prevent that fields (that should be updated by an import) are changed directly in the personnel file using the user environment, it is possible to set the corresponding fields read-only via the personnel file configuration or personnel file shelf on the “General Settings” tab, in the Externally Managed Master File Data field. This applies only to personnel files for which the “Managed Externally” option is enabled.
- In case of an error in a personnel file, the lines concerning the same personnel number are ignored.
- If the personnel file shelf is unstructured, the imported files are only displayed when the list is updated and if there is no search pattern that excludes the files.
The CSV columns are in general free-text fields of type string, number or date (yyyy-mm-dd). The Fabasoft Cloud ID can be found on the “General” tab of the corresponding object. The import ID can be used to update objects and assign these objects to other objects. Following CSV columns are available:
CSV Column | Field | Possible Value |
|---|---|---|
PersNum | Personnel Number | String |
FileShelfId | Personnel File Shelf | Fabasoft Cloud ID or Import ID (has to be specified if the import is carried out not in context of a personnel file shelf) |
Surname | Surname | String |
FirstName | First Name | String |
Sex | Sex | 1, 2 or 103 (male, female or diverse) |
Title | Title | String |
PostTitle | Post Title | String |
CommLanguage | Language for Communication | Reference of a system language (e.g. LANG_GERMAN, LANG_ENGLISH) |
Salutation | Salutation | String |
Birthday | Date of Birth | Date |
SocialSecId | Social Security Number | String |
PreviousNames | All Previous Names | String |
ImageTeamroom | Teamroom that contains employee photo | Fabasoft Cloud ID of a Teamroom |
ImageName | Photo | Object name of an image |
EntryDate | Entry Date | Date |
SeparationDate | Separation Date | Date |
Birthplace | Birthplace | String |
Nationality | Nationality | String |
Denomination | Denomination | String |
Company | Company (Textual) | String |
Orgunit | Organizational Unit (Textual) | String |
Street | Address (Street) | String |
ZipCode | Address (Zip Code) | String |
City | Address (City) | String |
State | Address (State) | String |
Country | Address (Country) | String |
AddrTopic | Address (Topic) | Reference of a topic (e.g. TermBusiness, TermPrivate) |
Email1 | E-Mail Address (Topic: E-Mail 1) | String |
Email2 | E-Mail Address (Topic: E-Mail 2) | String |
Email3 | E-Mail Address (Topic: E-Mail 3) | String |
Phone | Telephone Numbers (Topic: Business) | String |
Fax | Telephone Numbers (Topic: Fax) | String |
Mobile | Telephone Numbers (Topic: Mobile) | String |
PrivatePhone | Telephone Numbers (Topic: Private) | String |
BankAccountHolder | Account Holder | String |
Iban | IBAN | String |
Bic | BIC | String |
Qualification | Qualification | Import ID of the qualification (skills management) |
QualificationLevel | Level | Import ID of the rating scale value of the qualification (skills management) |
RoleDescription | Role Descriptions | Import ID of the role description (skills management) |
FullTimeEquivalent | Full-Time Equivalent (in Percent) | Number |
UserId | Assigned User | Log-in name of the user (user object) |
SupervisorId | Direct Supervisor | E-mail address or Fabasoft Cloud ID of the user (user object) |
AllSupervisorIds | Supervisors | E-mail addresses or Fabasoft Cloud ID of the users (separated by “|”) |
AdditionalPersNums | Additional Personnel Numbers | String |
Remark | Remark | String |
GrossIncomeSymbol | Gross Income (currency) | String (e.g. EUR, USD) |
GrossIncomeValue | Gross Income (value) | Number |
Assignments | Assignments | Import ID of assignments, separated by commas |
OverrideKeys | - | CSV columns of properties to be overwritten separated by commas (otherwise empty values are ignored and values are added in list properties) |
Note:
- To populate fields that can consist of several rows (e.g. Address), it is possible to specify several rows in the CSV file with the same personnel number (PersNum). If the FileShelfId is used, it has to be specified for each line.
- If it is defined in the personnel file configuration that unique personnel numbers should be used across all personnel file shelves, existing personnel files (PersNum) can be moved by specifying a different FileShelfId.
- If a user-defined form is assigned to personnel files, these properties can also be imported (the programming name of the respective property serves as the column caption).
- If several rows with the same personnel number (PersNum) but different personnel file shelves (FileShelfId) exist, a primary personnel file shelf is determined as described below. All rows that do not correspond to this primary personnel file shelf are ignored.
- The lines with an active employment relationship are preferred.
- In the case of several active or inactive employment relationships, the line with the most recent entry date is preferred.
- Rows without an entry date are considered older than rows with an entry date.
- If there are several rows without an entry date, the first row found is used.
Upload
With the “Upload” action, you can store files in the personnel file shelf. For more information, see chapter “Uploading a Document”.
Scan
With the “Scan” action, you can scan documents and directly store them in the personnel file shelf. For more information, see chapter “Scanning a Document”.
Pre-Capture
With the “Pre-Capture” action, you can pre-capture documents for an automatic scan. For more information, see chapter “Pre-Capturing a Document for a Scan”.
Create Personnel File Folder
If it is defined in the personnel file configuration or in the personnel file shelf that personnel file folders may be created on top-level, you can add personnel file folders with the “Create Personnel File Folder” context menu command. For more information, see chapter “Creating a Personnel File Folder”.
Show New Events
In order to be able to follow changes over time of personnel files, an own overview of the history is available that can be viewed from different angles.
To view events, perform the following steps:
- Navigate to the desired personnel file.
- Click the “Show New Events” action.
An overview of the recent events is displayed. The “Timeline” tab visualizes the time course; the “History” provides a textual overview. The other tabs represent different groupings.
Notifications about new events
Notifications can be displayed in the welcome screen or can be subscribed via e-mail.
To define notification settings, perform the following steps:
- In the user menu click “Notifications”.
- Click the “Settings” button.
- Choose about which changes and how you want to be notified. For the personnel file an own area is provided.
- Click “Save”.
Properties
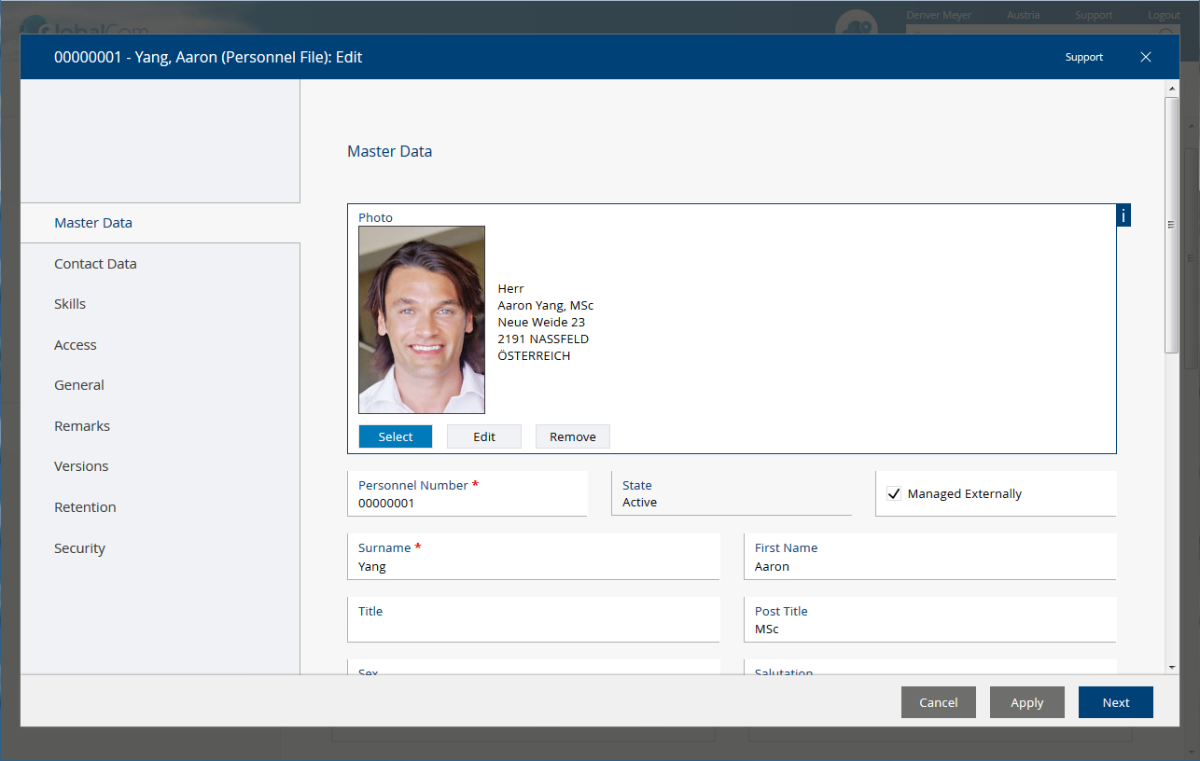
To edit a personnel file, perform the following steps:
- Navigate to the desired personnel file.
- Click the “Properties” action.
- Enter the desired data and click “Next”.
Note: To access the documents of a personnel file, click on the personnel file or execute the “Open” context menu command.
Besides the usual master and contact data of an employee, you can also specify the following:
“Master Data” tab
- Managed Externally
To prevent that fields (that should be updated by an import or via the SAP integration) are changed directly in the personnel file using the web environment, it is possible to set the corresponding fields read-only. The affected fields are defined in the personnel file configuration or shelf.
“Salary” tab
- Current Gross Salary
Shows the current gross salary (according to the salary history). - Salary History
Defines the gross salaries in the context of a validity period.
“Access” tab
- Assigned User
In this field, you can enter the employee to whom the personnel file is assigned. This allows viewing the documents intended for employees. - Direct Supervisor
In this field, you can specify the direct supervisor. This allows viewing the documents intended for supervisors. - Supervisors
In this field, you can specify all higher-level supervisors in the hierarchy. This allows viewing the documents intended for supervisors.
Note: If it is configured that users are taken over from the organizational structure the fields are displayed read-only.
More information can be found in chapter “Personnel File Access” and “Personnel File”.
„Assignments“ tab
- Company
Shows the company that is stored for the associated organizational position. - Location
Shows the location that is stored for the associated organizational position. - Personnel Area
Defines the associated personnel area. - Personnel Sub Area
Defines the associated personnel sub area.
Note: The property is only visible if a personnel area has previously been defined. - Employee Group
Defines the associated employee group. - Employee Circle
Defines the associated employee circle.
Note: The property is only visible if an employee circle has previously been defined. - Organization Key
Defines the associated organization key.
View as PDF
For metadata of a personnel file and associated documents, a PDF overview can be generated. If a watermark is defined in the personnel file configuration or personnel file shelf, the watermark is added to the document.
To view the personnel file as PDF, perform the following steps:
- Navigate to the desired personnel file.
- On the context menu of the personnel file, click “View as PDF”.
The generated PDF document will be opened automatically.
Note: With the “View List of Contents” context menu command, you can generate a PDF overview without the document contents.
Closing a Personnel File
Personnel files with a defined separation date can be closed. When closing a personnel file also the assigned documents are closed. After closing, no further changes are possible. However, canceled documents can still be deleted.
For retention-worth documents, the retention period is calculated and applied on the basis of the retention rule defined in the category. The retention period cannot be shortened anymore.
To close a personnel file, perform the following steps:
- Navigate to the desired personnel file.
- On the context menu of the personnel file, click “Advanced” > “Close”.
- Click "Next" to display the overview of the personnel file.
- Before closing, you can clean up the personnel file and deal with unwanted documents on the “Documents” and “Canceled Documents” tabs.
- Click "Close".
Note: If the document contains canceled documents with a category that defines a retention worthiness, a corresponding message is displayed. Click on “Remove Categories and Close” to remove the categories because no retention period can be applied to canceled documents.
The closed personnel file is stored in the “Closed Personnel File” field. The state “Closed” can be removed again using the “Advanced” > “Remove ‘Closed’ state” context menu command. This allows the personnel data to be changed again. The additional operations carried out during the closing, such as the closing of documents or the calculation of the retention period cannot be reversed.
Activity “Close File”
You also have the option to start a process for closing a personal file. To do this, execute the context menu command “Tools” > “Start New Process” on the personnel file and select the “Close File” entry in the “Prescribed Activity” field. The selected process participant has the possibility to close or not close the personnel file.
Canceling a Personnel File
Personnel files can only be removed from the personnel file shelf with the “Cancel Personnel File” command.
To cancel a personnel file, perform the following steps:
- Navigate to the desired personnel file.
- On the context menu of the personnel file, click “Advanced” > “Cancel”.
- Click “Yes” to confirm the cancellation.
The canceled personnel file is stored in the “Canceled Personnel File” field. Canceled personnel files can be restored using the “Advanced” > “Restore” context menu command. Users with “Full Control” can also delete personnel files permanently (“Delete” command and removing from the wastebasket), if no retention rules are violated.
Changing the Assignment of a Personnel File
Personnel files can be moved from one personnel file shelf to another. Depending on the settings of the current personnel file shelf a copy of the personnel file is kept in the current personnel file shelf.
To change the assignment of a personnel file, perform the following steps:
- Navigate to the desired personnel file.
- On the context menu of the personnel file, click “Advanced” > “Change Assignment”.
- Select the new personnel file shelf and define the personnel number if applicable. If it is configured that a copy remains in the current personnel file shelf you have to define the personnel number of the copy, too.
- Click “Next”.
- Define the settings which should be updated for the personnel file and click “Next”.
Working With Follow-ups
When using the follow-up functionality an e-mail can be sent to a user at a particular time. The follow-up may be defined for personnel files and individual documents.
To define a follow-up, perform the following steps:
- Navigate to the desired object.
- On the context menu of the object, click “Tools” > “Create Follow-Up” or “Manage Follow-Ups” (at last one follow-up is already defined).
- If you mark the follow-up as personal (only valid for the "Send e-mail" action), it will not be visible to other users.
- Select the Action that should be executed.
- Send E-Mail
Define Recipients for the e-mail. In the Message field, you can specify the e-mail text. - Start Process
Define the process that should be executed.
Note: The process has to be released for the organization.
- Send E-Mail
- Define the date of the follow-up. You can either specify an explicit date or let the date be calculated based on a base date field of the object. In addition, you can define whether the date should be recalculated if the base date value changes. This is mandatory if the base date does not yet have a value.
- Click “Next”.
Upon reaching the follow-up date and after processing the automatic task the defined action will be executed.
Working With Automatic Follow-ups
If a document needs to be reviewed or renewed after a certain period of time, follow-ups are offered.
A follow-up can be defined manually via the context menu or the category that is assigned to the document already defines default follow-ups. For this purpose, in the category, in the Default Follow-Ups field a corresponding follow-up has to be assigned.
Sending the follow-up is based on the Time Interval and the Base Date. The base date may refer either to a date field of the document or to a date field of the assigned personnel file.
Note:
- The assigned follow-ups are canceled when removing a category.
- If the default follow-ups of a category are changed, the changes can be propagated to the documents via the “Update Settings” context meu command of a personnel file shelf.
Displaying Master Data of an Employee in SAP
To display the master data of an employee in SAP, perform the following steps:
- Navigate to the desired personnel file.
- On the context menu of the personnel file, click “Open SAP Personnel Master Data”.
The master data is displayed in SAP.
Access Using the File System
Personnel files can be accessed via the WebDAV protocol using the file system. To do so you have to connect a network drive in your file system browser with following URL: https://<server>/<vdir>/webdav
Example: https://at.cloud.fabasoft.com/folio/webdav: new window
In the file system operations like adding or removing documents are possible.