

Preparation
This chapter supports you in getting started. You will get an overview of the basic setup and operation of the system.
Link between Digital Asset Management and Publishing
The Publishing solution can only be used effectively in combination with Digital Asset Management, which must also be licensed for your organization. This is because content that composes your publications is created, edited and managed media-neutrally within the DAM as assets. The connection is made once these assets are assigned to specific projects or products for (re)use, which in turn represent the core elements of Publishing. Conversely, content generated in a project/product context can be registered back into the DAM for media-neutral management.
Note:
- For a description of the procedure of the initial registration of the system, see the DAM User Help chapter "Initial Registration: new window".
- To authorize your users for the Publishing solution, proceed in the same way as for the DAM. You can use the same teams or create separate teams (e.g. "Publishing Administrators").
- Xeditor is integrated in both the DAM and Publishing solutions. For more information on creating and editing Xeditor documents, see the DAM User Help chapter "Xeditor: new window".
- Overall, we recommend users of both solutions to start with the document "User Help Digital Asset Management with Xpublisher on Fabasoft PROCECO".: new window
Basic Operation
The following chapters provide initial assistance for operating the web client.
Structure of the Web Client
This chapter will familiarize you with the structure of the web client and how to navigate the system.
Home
After successful logging in, the user will see his or her personal “Home” dashboard.
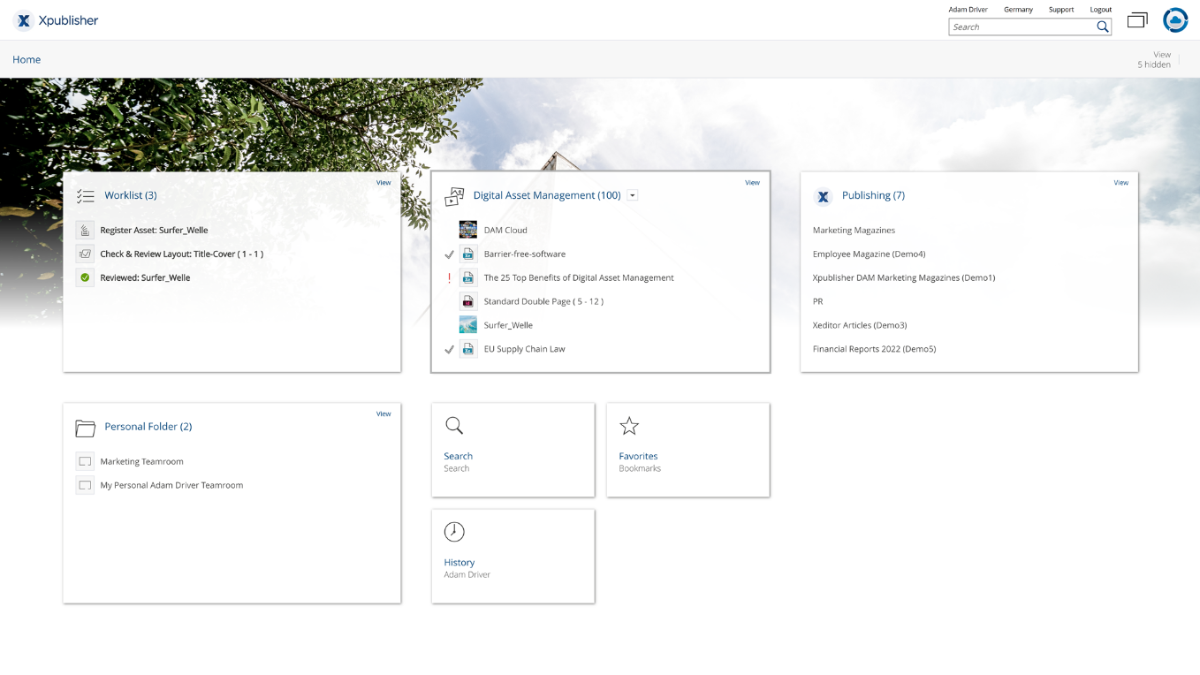
Depending on which solutions you have been licensed for and your personal settings, various widgets (e.g. "Worklist", "Publishing") are displayed. The dashboard concept of the home area offers you possibilities for individualization. For example, you can display or hide the widgets, and adjust their size and order.
Publishing Dashboard
By clicking on the "Publishing" widget, you will reach your personal Publishing dashboard, which will be used to explain the general structure of the web client below.
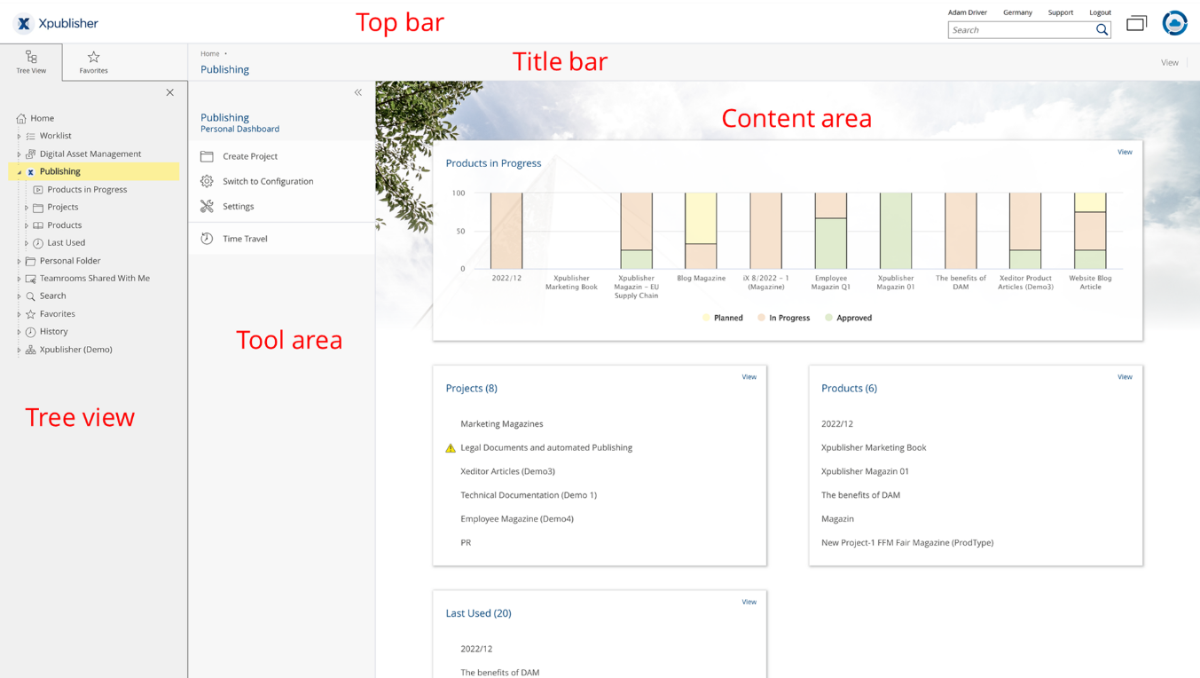
The web client is divided into the following areas:
- Top bar
In the top bar you will find your organization logo on the left (if set up) and on the right the user’s account menu, the data location menu, the support button, the logout button, the quick access button, the home button and the search bar.
Note:- The top and title bar are always displayed - regardless of where you navigate within the system. This gives you access to the actions there (e.g. support, search) at any time.
- You can find more information about the powerful full-text search with Mindbreeze in the Fabasoft Cloud user help in the chapter "Search with Mindbreeze: new window".
- Title bar
The title bar contains the breadcrumbs of the currently opened hierarchy. If you navigate in a widget within a solution, the other widgets of the same level are displayed as tabs. - Content area
The content area generally displays the content of the current object. This can be, for example, the widgets of the home or DAM dashboard, the subfolders and files of a folder, or the preview of a document. - Tool area
The tool area is basically available everywhere in the system except on the "Home" screen. In the tool area you will find context-dependent "actions". Common actions in the tool area are, "Team", "Settings", or "Time Travel". - Tree view or Favorites
Furthermore, you can display or hide the "Tree View" or "Favorites" area anywhere in the system, except on the "Home" screen. The tree view allows you to quickly orient yourself and navigate within the system. You can add frequently used objects (e.g. folders or documents) to your favorites. To do so, navigate to the desired object. In the Favorites area, you will then be offered an action to add it. Alternatively, you can right-click on the object and select the action "Add to Favorites" within "Extras".
Note: Up to three column areas can be displayed side by side (e.g. "Tree View", "Actions" and "Team").
Execute Actions
The following basic options are available:
- Left-click the desired button to execute the corresponding action.
- The Actions tool always contains the most important actions in the current context. The actions refer to the object displayed in the content area. For example, if you are in an Xeditor document, you can open the Xeditor document for editing using the "Edit" action in Xeditor.
- You can open the context menu of an element by clicking the right mouse button. Usually, in addition to the actions that are also offered in the tool area, you will find other less frequently used actions in the context menu.
- Context menu of objects
Execute a right-click on an object in the content area. The context menu of this object will be opened. - Title bar context menu
Execute a right-click on the title bar. The context menu of the object currently displayed in the content area opens. - Background context menu
When you are in a Teamroom or folder, right-click in an empty area within the content area. The context menu contains actions relevant to working with lists (for example, create a new item in the list).
- Context menu of objects
- To select entries in a list, click the checkbox of the corresponding entries. For example, you can execute a context menu command on several objects.
Fabasoft Cloud Client
To work efficiently, the installation of the native Fabasoft Cloud Client is highly recommended. The Fabasoft Cloud Client is available for Microsoft Windows, Apple macOS and Ubuntu.
You can start the installation via the web browser status (Account menu (your user name) > "Status" > "Web browser status"). If your organizational policies do not allow installation on your end device, please contact your IT support.
Further information can be found in the white paper "Fabasoft Cloud Client: new window".
Organizational Management
Initially, there is one member (the organization owner) in a cloud organization. This member is automatically authorized to manage the organization, for which purpose a widget "Cloud organization" is placed on "Home".
Create Users
To create a user, proceed as follows:
- Navigate to your organization via "Home" and then to the "Membership" section.
- Click on the "Add Members" action.
- In the User (Email Address) field, enter the user's email address.
- Click "Invite new user" in the drop-down menu.
- Enter the first name and last name and click "Create".
- To add multiple members at once, repeat steps 3 through 5.
- Click the "Add" button.
- Assign the full access edition to the users and click "Assign".
- Click "Invite" to send a membership confirmation email per member.
The added members can register for the first time via the invitation emails sent.
Note: Via the "Import Members" action you can also create members collectively via CSV file import. In the corresponding action dialog, you have the possibility to download a CSV template.
Create Teams
In addition to the automatically created teams "Fabasoft Cloud Enterprise (Full Access)", "Fabasoft Cloud Enterprise (Read access + Comments)" and "Fabasoft Cloud Enterprise (Access for External Members)", it is recommended to also create the following three teams:
- Publishing Administrators
Members of this team should be able to edit the DAM configuration (generally: editorial department management). They should also be given all rights at the shelf-level. - Publishing Users
Members of this team should be able to use the DAM (generally: members of the editorial department). - Publishing Users (External)
Members of this team should have access to external areas where they have been authorized (generally: suppliers, customers and external employees).
The purpose of creating these teams is to simplify the initial setup, administration, and use of the Publishing solution through role-based management of access rights. To create the teams, follow these steps:
- Navigate to your organization via "Home" and then to the "Teams" section via the "Membership" section.
- Click on the "Create Team" action.
- In the Name field, enter the value "Publishing Administrators" and click Create.
- Navigate to the team you just created and click “Add Team Members”.
- In the Users field, select the desired members.
Note: In a pilot phase, add only the designated users. You can display a list of all available members by entering an asterisk (*) and then pressing the Enter key, and select the desired members by clicking on them. - Click on "Add".
Repeat the process to additionally create the “Publishing Users” team and the “Publishing Users (External)” team.
Authorize Teams
To authorize the teams in the Publishing configuration, do the following:
- Navigate via "Home" to your organization, then to the "Licenses"/"License administration" area and then to the "App Configurations" area.
- Select the "Publishing Configuration".
- Click on the "Team" action.
- Click the plus icon next to the App Administrator role to open the search box.
- Type "Publishing Administrators" and press Enter to search for the team you created earlier.
- Choose the Publishing Administrators team in the drop-down menu.
- Repeat the process and add the "Publishing Users" team to the "App User" role.
- Optional: Remove the automatically added organization owner (context menu command "Remove") to ensure a consistent role-based authorization.
For the authorized members, the "Publishing" and "Synchronized shelf" widget is placed on Home. If roles are assigned while users are logged in, users must reload the page (F5 key) for the dashboard to be placed.
At the end of a pilot phase, you can create additional Publishing user teams, if necessary, to authorize different users in projects, products and external areas.
Note:
- The purpose of the synchronized shelf is to allow users when editing InDesign files locally, to also edit images locally. You can remove the widget when you don't need it and restore it in your personal DAM dashboard at any time (“Restore Personal Shelf”).
- If you have accidentally authorized the wrong team or user, click “Remove” in the context menu of the team member.
- Organizational management applies across solutions. This means that you can retrieve users and teams already created in the DAM context and authorize them for the Publishing solution as well. In particular, if the same users are to administer the DAM and Publishing, for example, it is sufficient to create only one administrator team and authorize it for the DAM and Publishing configuration.
- Beyond the initial setup of the system, you will find general information on organization management in the "Administration Help Fabasoft Cloud: new window".
Your start with Publishing
After the initial access-rights have been assigned by the organization owner (see chapter “Authorize Teams"), the defined Publishing administrators can start with the initial setup (see also chapter "Administration Help: Publishing Configuration"). If you are a regular Publishing user, continue with the following chapter.